


We continue to look at the genesis of Royal Navy Mission Command with Lord Horatio Nelson. The Battle of Cape St Vincent is his first famous disobediences, using his understanding of the situation, specific the view he has of how the battle is unfolding at the rear of the line and disobeys orders in order to meet the intent of his Commander, Admiral Sir John Jervis.
Have a listen to the podcast as we go through the battle and follow on with the maps below.
This is Part III of our look and looks at the Battle of Cape St Vincent. Check out Episode 1 of our Nelson and Mission Command series.
If you haven’t already, have a listen to the second Episode sets the scene for the Battle of Cape St Vincent.

At 11AM Jervis issues the order “Form in a line of battle ahead and astern of Victory as most convenient.”
11:12 “Engage the enemy”

11:30 “Admiral intends to pass through enemy lines.”

The Spanish, in 2 groups due to poor seamanship overnight, attempt to unite. A gunner on Goliath was to later write, “We gave them their Valentine in style.”
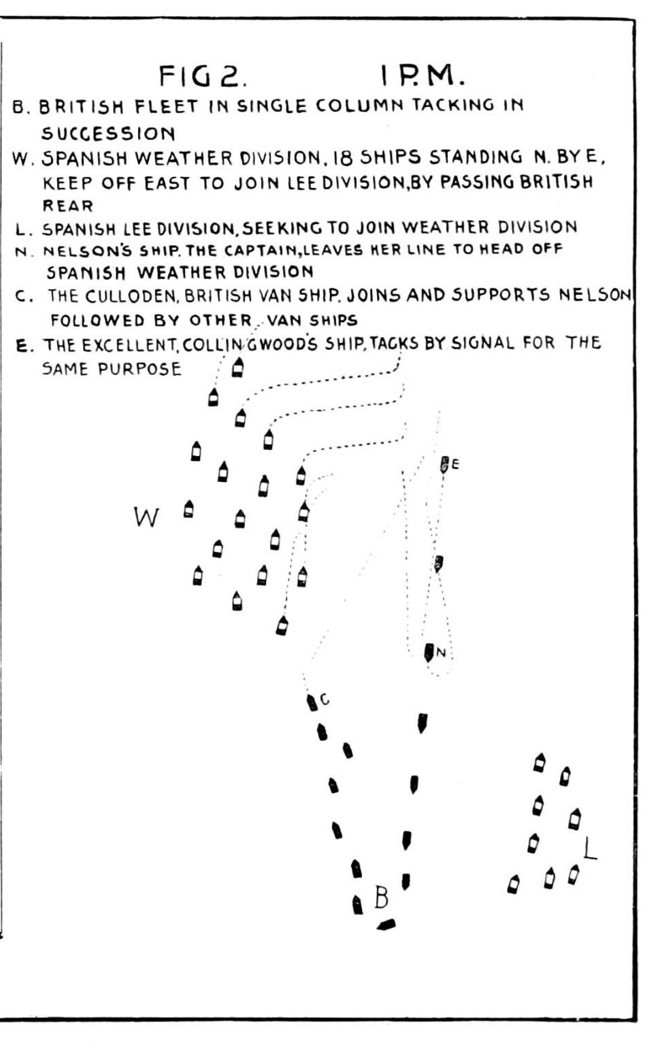
13:05. Jervis hoists “Take suitable stations for mutual support and engage the enemy as coming up in succession.”
Nelson can see that Culloden is going to struggling to catch the Spanish weather division, so he orders CAPT Miller to wear ship and slip HMS Captain between Diadem and Excellent and engage the Spanish ships. HMS Captain, a third rate 74 attacked the first rates, Santisima Trinidad, the Spanish flagship, (largest ship afloat with 130 guns), the San Jose, 112, Salvador del Mundo, 112, San Nicolas, 84, San Ysidro, 74 and Mexicano, 112.

Jervis, seeing what was happening, ordered Excellent and Diadem to support HMS Captain.

At 15:30, with the cry of “Westminster Abbey or Glorious Victory”, Nelson orders his boarding party onto the San Nicolas. HMS Captain was almost uncontrollable and had become entangled with San Nicolas’ rigging.
From San Nicolas, he ordered and lead his men to board the San Josef.

The Battle of Cape St Vincent and Nelson’s career, in general, represent the zenith of Royal Navy Mission Command. A combination of the culture, history, leadership, training, strategy and tactics created the environment that allowed for Mission Command to flourish. Two critical components created the emphasis on Mission Command – these were missions where a Captain could be months (or years) away from getting an answer to a question and the state of signalling, C2 and situational awareness.
Join the conversation on Twitter or Facebook.


